All right, I'm going to talk to you about some pre spawn techniques that you may not have heard of. These are kind of a little hidden secrets, so let's kind of get into it. The first one is a jig head on a floating worm. Yeah. So what I'm talking about here is you have a three 16th oz jig head. This is a Horizon Head from Gamakatsu. If you notice, it has a weed guard on it that's important and threaded onto it is a Zoom Floating worm OK. The floating worm part is real important. You can use those other manufacturers that make floating worm. This one is a Rabid Baits has a little bit of hair on the end of it. Any kind of floating worm will do, but a floating worm is what you need.
3/16 ounce weight, real lightweight. So what you're using is light gear. Fluorocarbon line is essential on this. I'm using 6 LB fluorocarbon line, Seaguar Tatsu fluorocarbon line and I'm throwing it on a 7 foot, 1” medium power, fast action spinning outfit. It's like a drop shot rod, something that's real limber. It's got a lot of give to it that's real important for this technique.
You throw this out into deeper water you can. This is perfect for doing road beds. And rock piles. Rocky points. And you throw it, outlet it, hit the bottom and let the line just kind of you'll know when the line stops sinking, reel up and get some tension on the on the line there. And then all you're going to do is give it a little hops, a little hop, let it drop, especially if you're fishing a steep bank. You lift it up just a little bit. It's going to come down quite a ways. You don't need to lift much. So it's very subtle and it'll fall back down and it sits on the bottom like this. With the tail pointing up and this little technique here, man, the big girls really like it.
Thing is, when you get a bite, don't reel down and wow, hit them real hard like you normally would. You're using this is a light wire hook 6 LB test. So really what you do is you reel down while pulling back. It's kind of a reel set. Just lean into it and you'll get them. They'll be set. You don't need a heavy heavy duty hook set and you're in open water, so play it out. Let the fish get to you and then don't. Don't swing them. You know this is a light setup. This is not the situation where anybody's swinging them. So I just reach down, lip them and pull them and you'll get them.
The wire guide really helps. Well because you're throwing out there and you know those isolated weeds that are just starting to grow this time of year you don't have any thick weeds. So you can get away with this light wire. You can even throw this, skip it up underneath docks, even shallow areas where you've got some weeds or maybe a lay down or some logs. This little weed guard on it's going to help avoid getting hung up and hooked. It's a great little tactic that you can load the boat with a ton of fish, especially when the bite is kind of slow and you can fish it deeper and get those big girls. So try that out this spring.
The next one is a shaky worm, not a shaky head. It's a shaky worm. This is totally different. So first of all, what you want to do is again, same spinning setup that we just had. So we're using 6 LB line, you know, in a medium power fast action rod. Spinning outfit. First thing you're going to do is you want a 3/16th oz tungsten bullet sinker. Like this one right here. OK, real tiny. A little teeny one and you're going to put a It's got to be tungsten or brass. Not lead, and we'll get to that in a second real quick here.
Between it and the hook is a glass bead. It can be clear or it can be white. Or I mean red. Some people use black but I like clear or red. And then tied to it you've got. A 1/0 hook. And a four inch worm. This is a Missile Baits Mini Magic Worm. This is the green pumpkin money color. I really like it a lot. But what you're doing here is it's not pegged as you can see. Not pegged. That's real important.
The reason why you want tungsten or brass and that glass is because you're going to shake the rod tip. And you want that? A tungsten to click. Against the glass, it's going to make little clicking noises. There's two ways to fish this.
One is vertically. You're going to be over the structure, you're going to be over the top of road beds, rock piles. You know, sharp Bluffs, bridge pilings, that sort of thing. And if you're going to be deeper than 30 feet, you might want to move up to an eighth ounce weight just so you can get it down there and maintain contact.
But the idea here is you get it down on the bottom, you lift up on it a little bit while shake, shake, shake, shake, shake, shake your rod tip just a little bit just to get click, click, click, click, click and drop it and let it sit again. And then lift it up, click, click, click, click and drop it. Or you can just let it sit there on the very bottom and justice click, click, click, click, click, click and let it sit.
This is a great way for catching fish that are post front. Or they're really deep and moving baits, they just aren't interested in it. This is a finesse tactic through and through, but boy does it ever work. The key thing is you know how much clicking you do and the pauses in between. You have to experiment with how long those pauses are and how much you click it until you figure out what the bass want that day.
Alternatively, another way to fish it is to cast it way out there and now what you do is you bring it back while shaking the rod tip just a little bit. While you're constantly reeling. If you guys are used to doing the hover technique right, Hover stroll. However you want to call it, Midstroll, Dimiki rig, whatever, there's a lot of different ways people call it. But. Here, you're not doing it through the middle layer of the water column. You're going to do it right at the bottom, right on or right near the bottom as you're bringing along just just off the off the bottom and you're shaking the rod tip.
Not hard, OK? Don't bam, bam, bam, bam, bam. It's subtle. You can barely see that rod tip moving. It's just, you know, you're just making a little movement. Click, click, click, click, click, click, click. That's the idea. That's why you want brass or tungsten if you're using lead. It's more of a thud, thud, thud. You don't get that clicking noise. So brass and tungsten is the way to go with this.
You just slowly reel it and again when a bass bites it. Same with the previous setup. You just lean into it and just lean in real and you've got them. It doesn't take much of A hook set for this light wire hook. It's only a one out hook guys. Maybe even a size 1. If you don't want to use a EWG you can use a straight Shank. I'd go to a size 1 then. It's real light wire stuff. But this has been working for decades. This is a technique that's been, it was really popular for a while and now it's kind of died off. But it's, I think this is something that bass don't see very often because I catch a lot of bass doing it. So give that setup a try.
Now the next technique is using glide baits, but probably not the way you think. First of all this is again a pre spawn technique, technique or tactic or tacknique if you want to put the word together. I think I just made-up a word here. It's more vertical structure right? Bluffs drop offs with a point comes down and then drops 30 feet right into a river channel or a a straight drop right next to a spawning area. A big flat and you got a good size drop next to it. Bridge pilings, steep banks, that sort of thing.
That's where you use this technique. This is where the bass will be staging before they get up into the spawning areas. A lot of the big girls sit down there while the males are making the beds. Perfect, perfect areas to be throwing this. So there's two different glide baits. I call them glide baits. The first one. Some of you would argue with me it's not a glide bait. That's fine.
This is a Rapala jigging bait. By Rapala. Look at this thing. It's got a hook here. It's got a hook over here. And it's hanging hooked down in the bottom the tail. It's got that kind of an angled. Clear, kind of odd looking bait. What it does again, spinning outfit. When you throw it out there, it has this real tight, tight spiral when it falls.
A lot of guys in the Midwest have been using this for ice fishing and cold water fishing, winter time fishing for years. But this is a really good bait to use on those vertical structures I just told you about. And you can fish it deep, 55-60 foot deep or deeper. Just throw it out there and let it slowly fall and do its thing, spiral all the way on down.
And you got to be a line watcher with this because that's the only way you're going to detect a bite really is going to see your line jump. Don't move. Or maybe you're in 50 feet of water and and it's sunk maybe 25 and it's not sinking anymore. That's a fish. Again, setting the hook. These are real thin light wire hooks, A real small little treble hook on it and. You know you can't just yard it really hard, you'll just rip the hooks right out of his face and you won't catch a fish. So it's got to be a light hook set with this.
But once it hits the bottom, if you don't get bit, then reel it all the way back up again and make another cast to another spot and that's all there is to it. It's very simple but it's very effective for those vertical structures in pre spawn conditions.
The other glide bait? Is using a jointed glide bait like this one. This is the SPRO Sashimi Swimmer. OK, now a lot of you guys are used to throwing these, casting and winding them in. This is different. You can use this on a bait casting outfit. I'd use 12 LB line on it, maybe 15 at the most. But the key thing here, and there's other glide baits like this, but it's a slow sinker that is critical.
It's got to be a slow sinker. Why? Because when you throw it out, first of all, it's going to it's going to fall in those nose first. The weights more up in here in the front, which is great. Again, you're fishing those steeper banks. Structure, rock piles, deeper drops, especially the ones that are, you know, those steep points near spawning flats. You let it fall straight down. And what you can do, you can give it a little pop with the rod and I'll make this shimmer and smooth and move.
And swim a little bit. If you give it a hard pop you could actually make it do 180. It will spin, but the idea here is just let it fall on its own and it will move slowly as it falls. It looks like it's a fish swimming. This is killer. Most people don't fish glide baits this way. They they do it horizontally, They're reel and cast and they reel it in.
This you're, it's a vertical fall type bait. You're doing, you're jigging it almost let it fall the way down to the bottom. Just like the previous bait. Same thing. Let it fall by. If it lands on a ledge, just pop it off the ledge and let it fall again some more. It's great for fishing those vertical walls and Bluffs and those bridge pilings. Really a cool way to fish these. Things. Try it out guys. It's a technique that is catching on but not a lot of people know about. Well now you see the videos and be able to see it, but give it a go. You'd be surprised at how well it works.
Now the next bait is tubes and that one is a little well more well known, more people with fish tubes. If you're not fishing tubes man, I don't know why, you got to do it. Tubes are effective year round and pre spawn is no different. There's really two different ways that I fish tube jig during this time of year.
One is a tube jig. The tube jig itself, See the eye is at the top. All right, it's a straight up eye on this tube. Perfect. This what it does when it's when the eye is up. It gives us wide slow death spiral. Unlike the rapala jigging bait, this one it just does a nice slow spiral. This is really good. You can fish as any depth you want. It's great for rip rap. It's one of my favorite for fish and rip rap. A Rocky Points, Rocky Bluffs. You know rocky shorelines and under docks. Skip it under docks and let it do a slow Spiral are right next to floating docks. It's one of my favorite baits to throw during the springtime, but eighty, 80-85% of the time I'm throwing it this way.
However, another way to do it again. So on spinning gear, same thing. 6 LB test fluorocarbon line, 7 foot one. I'll move up to a medium heavy fast action rod. The hooks on these are a little more stout and you can efficiently run cover. You can get jig heads that got wire guards on them too, so you can fish out around weeds or sunken timber or something like that without fear getting hung up.
But another jig head that I use is one with a 60° eye. See that the eye comes out a little bit more of an angle. That. What it does, it completely changes the way the bait works. Now the bait glides and swims through the water kind of erratically.
If you have light line, again, 6 LB line fluorocarbon so it sinks with it. Braid will float up with it and kind of inhibit it action, its action and you got to give it some slack line to let it do its thing as it's fallen and gliding through the water. This gives a kind of a swimming action. So sometimes the bass don't want to spiral action or a straight fall.
This kind of makes it swim and glide through. Sometimes they want that action. This is also really good if you find a school of bass that are sitting over structure. Maybe they're suspended over a rock pile, for example, or over a hump or near a ledge, but they're kind of relating to it.
You can take this on a, you know, a tube and swim it through that school of fish and pick up quite a few fish doing that. It's just a great little way of mimicking the small baitfish that the bass just can't stand. You got two different ways you can fish it now, spiral or gliding and any depth. I've caught fish up to 50 foot deep on a tube and all the way shallow as a foot. It's really a super, super versatile, so give that tactic a try this spring.
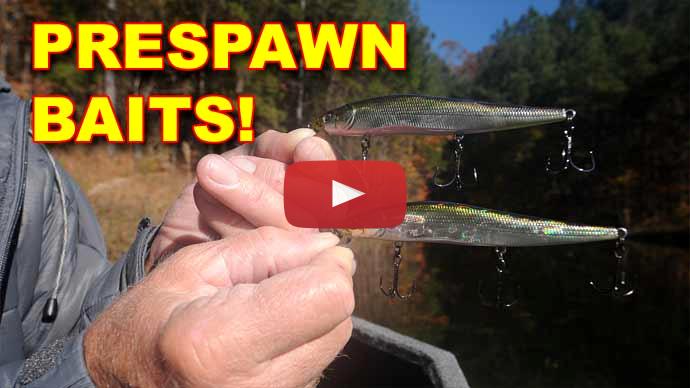
And then finally is what most people call the jerkbait. We call that a rip bait, and sometimes people still call it a rip bait, but a rip bait is originally what they called it. And the reason being is you take a medium diver. Like this one here. This is a SPRO McStick and right. And you would take this puppy, throw it out. Now this would be on a bait casting outfit, 12 LB line, medium heavy fast action rod, like a 7, two to seven, six.
Actually a little bit longer rods better because what you're doing here is you cast it out, you reel it down to the depth that it dives down to and then you use the rod and give it a big sweeping action and it goes in the water and then it suspends and stops and. And you reel up to it and then sweep the rod and reel it back up again. Don't bring the rod all the way back, you know, past your head or anything, because if a fish hits it, you have nothing left to give a hook set.
But bring it up about, you know, keep it in front of you and then reel it all the way down and again sweep it again. That's called ripping it. That's the actual technique of ripping it. And a lot of times the bass will hit it on the pause. Sometimes they'll hit it when you start again is pause, you let sit and then you start again. They'll hit it then. So experiment with the duration of the pause. That's kind of key with that colors here, you know, this is kind of a flashy, somewhat Chrome type color. This is what I would use in sunny Bluebird days.
A matted finish is what I would use and dirty water or on cloudy days and translucent color I would use more on a, you know, clear water. I have a lot of clear water in my area so I like the translucent colors but. Those aren't hard rules, just as a general rule.
Now, another way to fish a jerkbait is that the shallow jerkbaits like this see it's got a small lip. So it doesn't dive very deep at all. And you notice this is the clown color. I like the clown color in the spring, that red in the front. There's a lot, lot to it. Red in the spring is great.
This only dives down, you know, 5-6 feet or so. You can still use bait casting on it, but some models are really light and so you might want to flip over to spitting outfit and I would use on spinning, I would use 8 to 10 LB line.
You can get it down a little bit deeper bait casting 12 LB and mainly because it's these these hooks here. Right, there's still, you're still talking thin, small hooks. You don't want to overpower it with 15 LB braid or something. Strong fluorocarbons, best fluorocarbons got that stretch to it, which I didn't mention earlier. But on all these with the small hooks, you want a little bit of stretch, a little bit of give along with that, a little bit of limber rod. You're throwing these with the medium power fast action rod as well.
That rod tip will give, that line will give and it'll keep them pinned with these smaller hooks. That's real critical. You're using braid. It has no give whatsoever at all, and the fish can use that as leverage to pop off. So this is none of these techniques are. There's no place for braid. Fluorocarbon and with this one though, instead of ripping it like you did earlier here, you're jerking it, you're giving it twitch.
So you twitch, twitch, twitch, pause, twitch, twitch, twitch, pause relatively quick, even in the water's cold. You want a relatively fast movement and you want to trigger a bite. That's usually the one that works for me is a faster one. Now if you really the fish don't want it, you're not getting bit, then you can extend the pauses and maybe not twitch as hard real light. Almost subtle movements and let it sit longer.
And also another way to do it is you can let it float on top and slowly reel it almost like a wake bait. You know, just under the surface, so it wobbles back and forth. Sometimes that also works really well.
So it's like those are like 3 different ways you can fish these jerk baits other than the ones you've been. Caring about the most, even suspending jerk bites. So try that out this spring. And just a different technique, a different way of fishing them than maybe you've tried before. You'd be surprised how well it works.
With all these techniques, you're bound to catch a bunch of good fish. Hopefully some lunkers of a lifetime. Hope that helps. For more tips and tricks like this, visit bassresource.com.