BORDERBASSER
Members
-
Joined
-
Last visited
-
There is a guy over at tackleunderground that is carving his jointed swimbaits out of PVC, but I don't have any details. I wish I did.
-
Thanks guys for the comments. The two baits yall made look fantastic. It seems to me that painting will need to be done assembled to get an even look, but applying epoxy would be best done disassembled. The cool thing about using the cotter pins, is you can spread/bend the pin apart just a little, squeeze back together, and insert it in the hole. That way, it will spring back apart in the hole and stay put without any gluing as long as your not too rough on it. You can put it together to paint...take it apart to clear coat, then put it back together for final assembly. Anyway, that method makes the most sense to me so far. I was just wondering if anyone else was doing something similar. Thanks again.
-
I was just wondering how you guys do it. I have made a few swimbaits so far, but have not painted them yet. It seems like it would be especially difficult to to seal the baits with epoxy and keep the hinges clear...especially if you wanted a really tight and clean looking joint. I use cotter pins linked together and epoxied in and would think that I could assemble and disassemble as needed during the painting and coating process. Then after all is said and done assemble and epoxy the pins in for a permanent assembly. Anyway, that is just what I'm thinking. What have yall found to work best. Thanks.
-
The word around town here is that he just went into a partnership with someone and bought the Amistad Lodge, or at least the restaurant just ajacent to it. I heard from someone who works there that the have really big plans for it. It is about time!
-
It won't take much air to get what you need. I use an aquarium pump if that tells you anything. Maybe just a few pounds. If you use an air compressor, you will need a regulator that is capable of adjusting that low. Just make sure you use enough air that when you turn it on, the powder approximately doubles in volume and doesn't spew out the top. I would start of trying to fill the cup about a 1/3 full and go from there. That is how I figured mine out. TJ
-
My hat goes off to you. That is FANTASTIC workmanship. I can't believe someone could do those kinda weaves on his second rod. Your work and talent far exceeds your experience. That is the kinda work I would expect to see from someone with much more experience. TJ
-
Thanks again guys for the kudos. Wittler, you my friend(and many others who do what you do) are the craftsman. You make some fine looking baits. I already pour my own softplastics, but I think I may have to wait a while before I get the bug to build any cranks. I have only been doing this less than a year and have only made about 22 rods so far, so I have a ways to go before I consider myself a craftsman of fine rods. Thank you though very much. Justtrying, if this is what you mean by "what exactly did you ask for", here ya go pardner... WFG2 X 1 2" tapered foregrip WFG3 X 1 3" tapered foregrip WBBC X 1 tubing to butcap eva bushing WBTC X 1 tubing to reel seat eva bushing WFGFC X 2 eva caps for narrow end of tubing EVABC20 X 1 (there are several other butcaps that will fit as well) WHKA X 1 foam arbor for main grip (will need to be tapered to fit) Even though the WBBC and the WBTC were designed for the regular tubing, they will fit the foregrip tubing without having to taper them to fit. All the bushing have a 1/4" hole with the exception of the foam bushing which is a 3/8" (I think?). TJ
-
That is exactly what it is. Thanks for the nice words. TJ
-
I forgot to mention that the components were purchased from fishsticks4u.com if anyone wanted to know. It was a bit confusing for them at first, but they were, as always, first class at helping me get what I needed. TJ
-
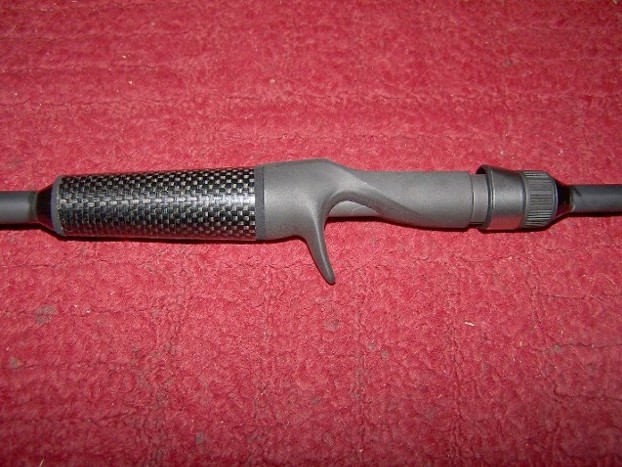
Thanks for the kind comments guys. They are the tapered woven foregrips from Batson. I just never have been satisfied with the look of some of the split grips I have seen where regular tubing was used. They all just looked a little too wierd to me. This looks a little more natural. I was flipping through the Batson catalog one day and thought... 8-)I wonder? I did a little research and sure enough, the OD on the fat end is the same as the regular tubing so the EVA connection parts for the regular tubing were compatable. Basicly, the parts that connects the butcap, and the part that connects to the reel seat. The EVA parts on the tapered end are the ones normaly used for the foregrip. I really wasn't sure if I should put the epoxy checks or not, but I'm glad I did. TJ
-
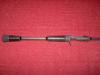
One more. Sorry I couldn't figure out how to get them on one post. TJ
-
-
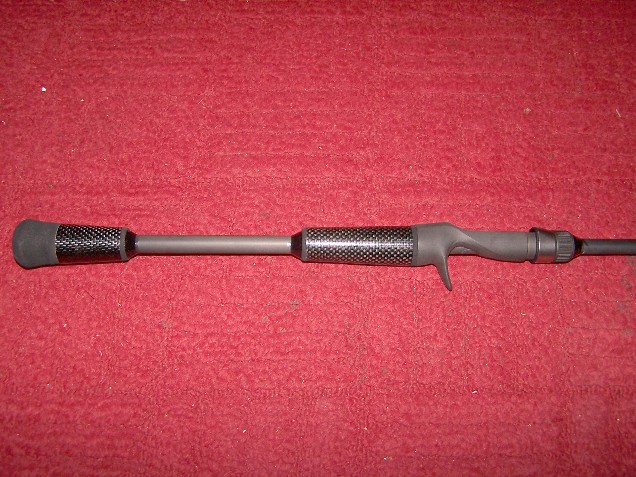
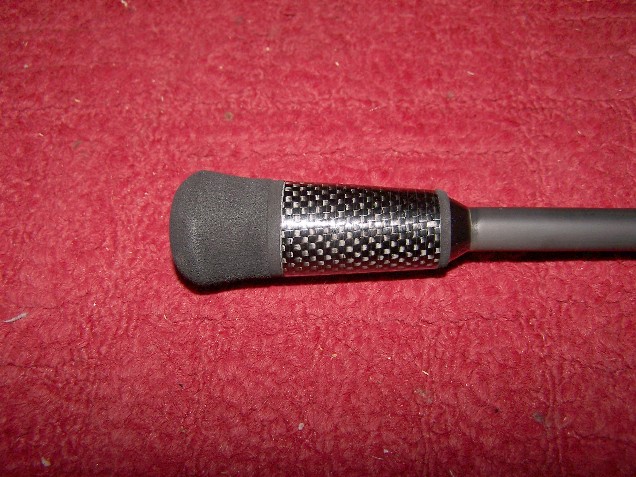
Well guys, I alluded the other day on one of the post of doing something a little different than anything I had seen before. Although I have seen split grips made from the graphite handle material, I have not seen or heard of anyone doing it with tapered tubing. The rod is an All Star Titanium 807c to be used for plastics and jigs. I haven't yet done any threadwork, just the handles, seat and epoxy checks. Tell me what you guys think. Have you seen this attempted before?
-
One thing I have found and it rings true for all epoxies, is you need to get it out of the cup and spread it out on something. I too have had the same problem in the past with the 30min. epoxy. You need to remember that two part epoxy cures by heat. When you leave the mix in a small confined area like your cup, the exothermic reation is actually exagerated. If you will spread it out on to some foil or something, you will find that your working time will increase. TJ
-
I'm not even gonna ask how you managed that LOL!, but that is a bummer. I left the hood off my first one. ;D Didn't realize it till I had the whole thing almost wraped. If you are carefull you can get it off and maybe salvage it with a little heat. Other wise, I think you'll probably have to VERY carefully cut it off with a dremel. You need to do a little searching to find the specifics on how to remove it as I have only done it a few times. I'm sure reelmech would be able to help you a little more than me. Hopefully you have not wrapped the rod yet. TJ