GooseBoots
Members
-
Joined
-
Last visited
-
70GameFisher, I did mods on the same boat. Looks like your doing a great job. http://www.bassresource.com/bass_fishing_forums/YaBB.pl?num=1207827196/0 Bruce
-
Maiden Voyage was this past sunday. Everthing went well. We were out for a couple of hours late in the afternoon. I was pleasantly surprised at how well my Min-Kota 36 performed. However, we did a lot of crusing checking out the lake, so it ran the battery all the way down. I'm probably going to go with another battery for back up on a full day of fshing. Wind was the only problem. I dropped the anchor and caught my first Crappie. 6' or 7" and was probably a white Crappie. The fish tangled our line and pulled my friends around my prop. I was extremely pleased with the advice from my local tackle shop. They helped my choose a very good St. Croix rod, a Daiwa Reel and the jig I caught my Crappie on. Most interesting was they advised me on was catching the fish instead of everything in the store. I'd like to give a shout to Susquehanna Fish and Tackle for the Great Advice and Free Seminars they conduct. Check them out @ http://sfttackle.com/ Oh, I have no arrangement with Susquehanna Fish and Tackle. They are a Mom and Pop shop with the sons George Jr. and Mike, who are semi-pro tournament fishers. Thanks, Bruce
-
Home Depot indoor/outdoor cheap crap carpet, and indoor/outdoor carpet glue. Bruce
-
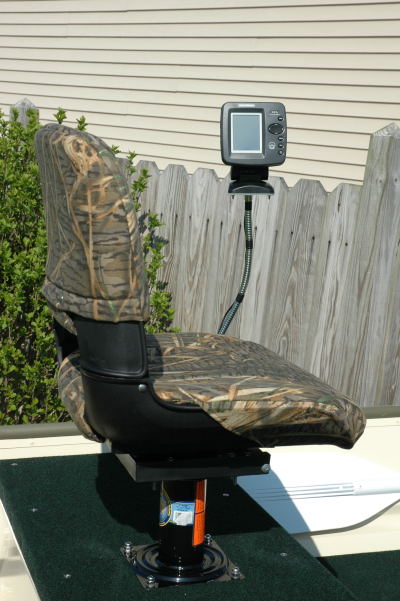
Gatorblazer, If your thinking about something like this take into consideration the screen size and heft of your fishfinder. My fishfinder is a Humminbird 343C. It has a very small color screen, so I do need to have it quite close to see it well (screen size and I wear glasses). Say for instance a unit is heavier, I would have to use a 12" or 18" gooseneck which is stiffer and less flexible. Seat height is also another consideration. Bass Pro sells a real nice Ball Joint type pedestal. I bought one and found that the fishfinder sat to low for my neck as I can keep my neck bent looking down. http://www.basspro.com/webapp/wcs/stores/servlet/Product_10151_-1_10001_98437_200001006_200000000_200001000_200-1-6 http://www.basspro.com/webapp/wcs/stores/servlet/Product_10151_-1_10001_98612_200001006_200000000_200001000_200-1-6 Both these products will accomplish what I have done both cheaper and stronger. Good luck in finding your solution. However, be prepared to do some jury rigging unless you specifically match products to your fishfinder unit. Bruce
-
Gatorblazer, My fishfinder is very adjustable. It can be moved lower and out of the way easily. I can lower it using a multiple sweeping bends. The goose neck is 24". An 18" is to short and doesn't flex as much. I don't see that the setup is inhibiting, but more as less strain on my neck due to my implant restricting rotation of my neck. My neck issue caused me to another also go with the swivel seats. Bruce
-
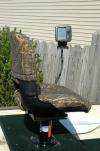
Here is my own design for my fish finder. The GooseBoot's Gooseneck. I have a steel rod in my neck, and where glasses. I wouldn't see or enjoy my fish finder if I mounted it on the carpeted seat base. Well, I knew I would need to bring it closer to my eyes so I thought of the gooseneck like a lamp I have. Luckily the gooseneck supports the weight of the fish finder. Any heavier it wouldn't work. There is more than enough adjustment to move it out of my way when needed. That's all the photo's I'll post unless someone ask for a closeup of a detail. Thanks for all the replies and suggestions. Being honest this is my first boat and first time I've done this sort of work. My best advice is that you do what you want. However, keep it light and keep it sturdy. Expect to run into snafu's. Bruce
-
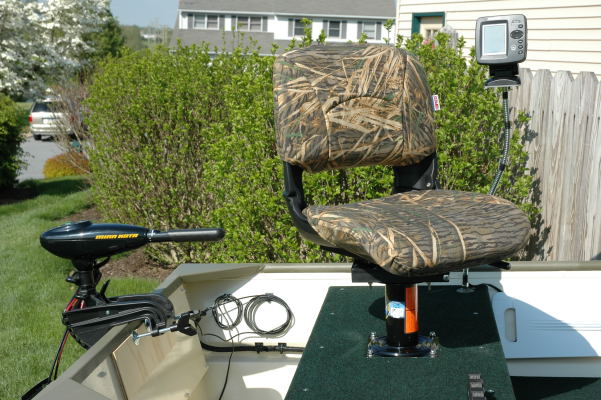
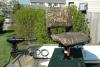
Here is the rear seat in relation to my trolling motor. I've decided to keep the seating installed on center line. To reach the tiller, I just swivel my seat to 45% and I can reach the tiller look forward and still be comfortable. Bruce
-
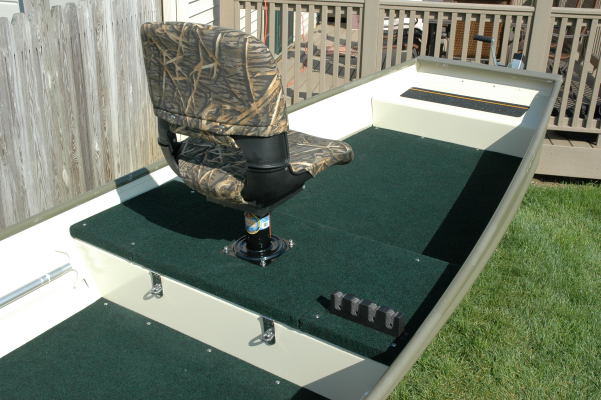
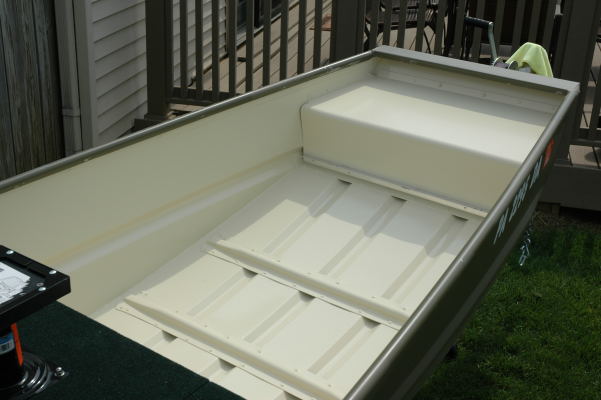
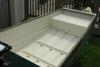
Here is a Photo looking from stern to bow. Bruce
-
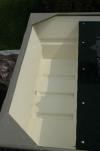
Good Morning, Here is a Photo of my forward seat and casting deck area. Note I've decided to leave the forward mini bench uncarpeted so it can be used as a step off and step on. Also the use of the anti-slip stair thread will allow me to use a camo boat cushion as a third seat. Bruce
-
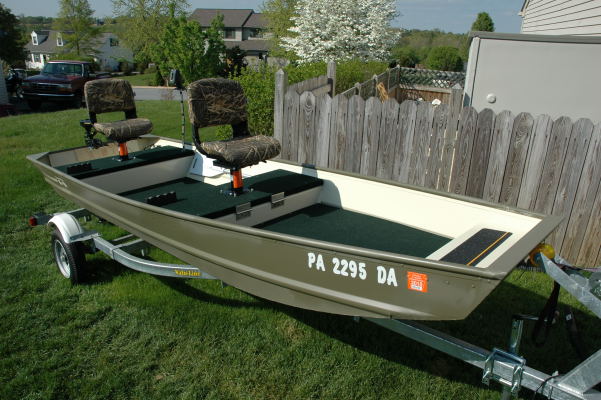
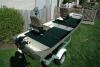
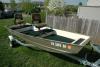
Here is an overall shot of my finished boat. The only thing I have left to do is to touch up my Gunwales. However, I will have to wait for an extremely calm day so I can spray them. More Photos tomorrow. Bruce
-
Another but better shot of the Rustoleum paint is where my forward casting deck is located. Bruce
-
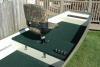
Well after a few rain delays I'm Finally Done... I have taken Photos and will begin to post them tomorrow morning. Most photos are overall shots with some close shots. First to catch up where I left off is a Photo of the Rustoleum Paint. This is the Transom and battery compartment. I'm not sure if I'm going to leave this area exposed. Bruce
-
MCHammer40, I just got my first boat last month. I live down the street in Lancaster and share the same fustration. I don't plan on fishing 9.9 restricted lakes. I would keep the Outboard Motor. You'll need it to get out on the Susquehanna or other rivers. The Susquehanna is a fantastic smallie fishery. In my case, a 15 HP Mercury Tiller weights only 115 lbs. so it would be easy on and off. I guess it would be a little more of a difference in the ease of removing with remote steering. While on the electric motor lakes. I plan to keep my outboard safe at home. It's my understanding you don't want to be seen with an Outboard any where near an EMO lake. Bruce
-
MA1232 and friends, I called Rustoleum Tech Support about my issue with the Factory Paint. What happened is I did a 2'X2' area as a test using the Rustoleum Topside paint. It didn't turn out well, at first I thought it was because I didn't prep very well. In fact, I only power washed the factory paint. Since it was flat green I thought it was a primer. The Rustoleum Topside didn't stick well. Rather it did or didn't stick. During my second call to Rustoleum, we both agreed I probably should have taken my boat to bare aluminum. So the steps I'm listing is exactly how Rustleum instructed me. 1) I stripped with Kleen-Strip (?) from home Depot. It's the liquid with the spray bottle. At first I stripped with a plastic puddy knife. Next,I used my power washer with the lowest pressure nozzle it has. Then I stripped a second time using a scotch-brite pad. Again I power washed. 2) I spent a couple hours cleaning around crevices and rivets with an old window putty tool a scotch-brite pad and another quick wash. 3) I was supposed to do a paint thinner wash to remove stripper residue but it wasn't needed. The power washer did a great job. 4) Next you sand to roughen the surface. However, I had found some extremely rough scoth-brite pads at my local hardware store. They really saved me alot of time and elbow grease. 5) I did a quick rinse with the garden hose to get rid of the knats and scotch-brite particles. At this point I looking at a shiney new hull because in fact it is a new boat. 6) The final step before paint was to do a denatured alcohol wash. According to Rustoleum, your rags have to come off extremely clean with no black residue. Luckily I got away with one white T-Shirt with almost no gray residue. 7) I used my air compressor and blew out the hull. 8) Using a premium sash brush and those new fangled foam rollers my paint guy sold me, I put on 2 coats, 1qt. each of Rusoleum Topside Primer. I'm not sure if it was just sales or I really needed it, but Rustoleum Tech Support was adamant that I used it. 9) After a couple days of drying, and I mean between each coat also, I painted with my Rustoleum Topside Paint. Now I realize it sounds like alot of extra work with all the power washing, but without it I would have struggled with the stripped paint debris while painting. I am glad I did so because I didn't have any dirt to contend with. Although, I did have a knat swarm ticking me off to no end, and a couple missed paint drips which wet sanded off. And of course I could skip the paint thinner wash...Yeah. How well is this paint going to hold up? I don't know. So far I've been installing all my pre-built decking, banging tools around and climbing in and out of my boat without damage to the paint. It took me 2qt. Topside Primer 1 per coat, and the same for the Topside Paint for a total of 4qts. @ $12.49 per qt. = $49.96, 2gal stripper @ $22.00 per gal. = $44.00 about $25.00 brushes and supplies for a total of $118.96. This in for the interior of my boat only. My boat is a Tracker Topper 1436 LW. Good Luck, Bruce
-
LBH makes a very good practical point "let's remember,...it's paint on a jon boat, they are made to be beat up". I would not have painted with rustoleum if my factory paint job was a quality job. Hell, even the touch up paint didn't match. I'm more concerned with getting an adequate amount of paint protecting my hull instead of a micro thin coat of paint. I bought my Jon Boat to double as a bass/duck boat. And if you think your Jon Bass boat will get banged up, you should see some of the Jon Duck boats I have seen. Even still I want to keep my boat as Maintained, Clean and Comfortable as I possibly can to enhance my enjoyment. There is nothing wrong with wanting a highly polished manicured look like some higher end bass boats. But in that case, it demands higher skill and product quality etc. I grew up painting every ugly bike, chairs, chainlink fences and every piece of sh@t metal known to a teenager with Rusto, so again I looked to Rustloeum. Hey, so If I have to repaint or resurrect my Jon Boat after X number of years, so be it. And one thing we can't loose sight of is the number of neglected aluminum Jons we've seen brought back from the dead. So I were to ever screw it up or neglect it, I can strip back to the brght and shiney. Thanks, Bruce