ernel
Members
-
Joined
-
Last visited
Everything posted by ernel
-
As far as how long will the two part epoxies last. There is no shelf life on epoxy. The resin will slightly discolor over time, but will not go bad. It will be something that you would not want to use on a light colored blank or light thread, but would not show up on a darker background. If the resin is left in a cold environment, it may crystallize, but can be placed in the microwave and nuked in 10-15 second blasts and stirred between each trip in the oven. The resin will change back to its normal consistency. I personally use Fex Coat lite, but others use Threadmaster. Both are quality products. It is all in what works for you. Eric
-
Ah Son of a monkey. Yes I was meaning to say that plexi would not hold up well. Too many things going on in the back ground at home while typing. :-[ :-[ :-[ :-[ OOPS! Eric
-
Lexan will not hold up well. It also has a problem with become brittle when exposed to colder temps. I normally pick up a 48" long by 5" piece of 1/16" lexan for 5-7 bucks. You can also find it under the name poly carbonate. Lexan is a mfg name where as poly carbonate is a common/industry name. I can make plenty of lures out of one strip. Eric
-
Flex Coat comes in different product lines. One line is used for finishing wraps. This is the one that Marty is using as a top coat. The other is the Rod builders epoxy. This is the product that is used to glue components together during the rod build. Marty was at one time using this as his sealing coat prior to painting his lures. It's primary purpose is to glue, and holds up very well for the purpose of holding reel seats and cork to the blank. I have had to redo a grip that I put on with Devcon that failed after less than 3 months use. The Flex Coat is more flexible than the D2T and is holding up very well. It would probably hold well for use on hook hangers as well. With all that being said, I have used Devcon 5 minute on every lure that I have built without having a single hook hanger pull out. The wood will split before the hook hanger will come out. In over 4 years I have only had one lip pull free. That was after catching more than 50 fish. 8 of those fish were over 4 lbs, and three of those were over 5lbs with one just shy of 7. The lip came out due to a hook penetrating between the lip and the ballast weight. The balsa soaked enough water to cause a failure due to swelling and loss of integrity. Not an epoxy failure. The advantage to slow cure epoxies over fast curing is the fact that the slower the cure the deeper it can penetrate into the wood. In theory creating a stronger bond. With balsa being a very soft wood, it can soak deep into the wood as it cures. The slower curing epoxies are also more flexible after fully curing. I am just too impatient to wait 2-3 hours for the D2T to set up when I can be working on the lure in 10 minutes. Eric
-
In order to make the slot "square to block", you must first ensure that the platform the stock rest on is square to the blade. Regardless of whether it is a scroll saw, jig saw, or a band saw. If it ain't laying square, it ain't cutting square. Blade tension on a scroll or band saw also plays a big part also. If the blades are too loose it will allow slop to enter as the cut begins. Slow and steady is the best advise I was giving. Eric
-
Kb, I agree fully!!! Any "true" builder will have many so-so designs that are trashed. If one wants so-so, then they sell them all day at Wally World. I have personally trashed my share as well. In the beginning, I would have probably 20-30% of my cranks that were not flops. Design ten, and only 2 swim the way that I was looking for. That was pretty disheartening. Over time, that changed to where now 6 or 7 out of 10 new designs swim the way I want. There is a huge learning curve that only comes for testing many lures. It involves line tie size and location also. What will happen if I chest weight this lure with an extra 1/4 oz? How much depth will I gain? How much wiggle will be lost? What happens if I use a square bill instead of a round bill in the same length? Then my favorite. Why does this one lure out catch 4:1 over any other that is made in the same shape, weight, wood, and lip. What makes this lure hunt? That is when it really gets interesting. Eric
-
Marty, You continue to impress with your endless ideas on paint schemes. I am amazed at your creativity. Love the round body styles. Eric
-
David, You have got some serious talent. Very nice work posted above. Eric
-
I'm with fourbizz. I have the Iwata Kustom and love it. I also have a Badger 175 that I started with, and only use it to spray heavy pearls.
-
I'm with reel mech. I will have at least 3 hours alone in just test casting. Take your time and make sure you have every thing correct, not just your wraps and finish, but the complete build. I can assemble a rod in in 5 hours, but not build and perfect the design to that particular blank, line size, guide size, and reel. I also will go against the grain and tell you to avoid a kit. Do a lot of research and reading before buying anything. Buy the blank and components to your specs, not a cookie cutter kit. Pick your handle to fit your hand not the one some company thinks will complete a kit. Guide size to fit the line size and application. Place your guides at the correct place on the blank by preforming a stress test, and test casting. You will be amazed at the difference a 1/2 inch will make when you move the butt guide the wrong way on a spinning build. As far as expense goes, you do not need a lot of high dollar gadgets to get started. I built my first rod on a SC3 Blank and had less than $190 invested including shipping, epoxies, Fuji guides, Fuji reel seat, and two dream reamers. Used my lap and a fly bobbin for a wrapping station. You can cut 2 v grooves in a card board box for a rod holder. Use a cup to hold your thread and pass the thread through a book for tension. Is it pretty? No, but it is functional. If you like building, then buy a little here and there until you have the things you feel that you need. If you build a hand wrapper now before you build, then build a hand wrapper after building a dozen or so rods, then they will probably be very different. If you feel that you have to have a wrapping station, then look at some of the ones that other builders have built to get an idea of where to begin. I will however admit building some of the tools has been almost as fun as building the rods. The most important thing to me when I finish a rod, is that it is mine. From design to function, I made the blank into the best rod I could build without following someone else's specifications or guide spacing chart. Eric
-
Well in a nutshell, building micro is using micro guides. Using 4mm guides and even smaller. How much weight can be saved is dependent on how small you go. 10 LSG 3.5 weigh .41 grams 1 BFAT 4.5(3.9) tip top weighs in at 1.5 grams. You would have to use 30 LSG 3.5 Micro guides before the weight would equal the tip top's weight. By using the micro guides, you keep the weight of the tip portion of the rod lighter. This in turn will improve the over all control of the rod, allowing for more precise casting with less effort. A lighter tip will also create a more sensitive rod as well. When building a spinning rod as you are. you can still build "micro". You can actually use a smaller butt guide as well. One of the instructors at the expo this weekend was using a size 10 for his butt guide and was running 1.5 mm guides from the choker out. The butt guide was a high frame 10. I haven't got that brave yet, but I will. Saying that these guides are very small is a huge understatement. You can actually pass a 4mm micro through the center of a 6 mm guide. With that being said, micro is not the end all of all builds. It does have it's place, but also has it's limitations. If you use leaders, then passing knots has to be considered. As does the use of real heavy, or stiff monos and fluorocarbon lines. Test casting during the "design"of your build will tell you when you have it right. How do micros cast. The rod I am building for my father, is set up with 4 mm guides spiral wrapped. I can cast a 3/8 oz lure and almost spool my reel. It holds right at 95 yards of 12lb XT. There is only 4.5 complete wraps left on the spool. Not rings, but complete wraps from one side of the spool to the next. Once again, I will very rarely cast this far as it will be "out of range" to effectively set the hook, but it means that I can cast easier to the specified targets that are within range. The blank is a Batson RX7 IMB843 MH Fast tip. If you have anymore questions, I will try to answer what I can. In order to get a full education in micros, you can go to rodbuilding.org and use the search function for micros. You will get hours and hours worth of reading. Thanks for the props on the siggy. Eric
-
As far as reel seats go, I prefer the graphite as I think it has more sensitivity. Mudhole has some of the seats you are referring to on their site. But you can get the graphite in larger sizes to fit you hand and be more comfortable also. As far as ti Sic guides, the cost difference is not worth the weight savings over alconites IMHO. A Ti Sic 6J weighs .120 grams, and an alconite 6J weighs .173 grams. You will never feel the difference in weight once on the rod. You can save that much weight by using thinner coats of finish. Plus the alconites will handle any of the lines on the market. If you really want to save weight, then look into building micro. Eric
-
The top two are super sharp. ;D Very nice body style also. Of course you already know how I feel about the 'gill on the bottom. Eric
-
Definatly like the scale pattern under the foil. Very nice indeed. Eric
-
Both look sweet. I would throw em' both. Eric
-
For the folks that do not want to have to "re-learn" a new epoxy top coat, you can get D2T on line. It cost a little more than Wally World, but you at least have access to it. http://www.mudhole.com/Shop-Our-Catalog/All-Epoxies It is about 3/4 of the way down the page on the left. You will see every other epoxy and finish that is used in rod building also. Mudhole has great cust service and fast shipping. Eric
-
There are two types of epoxy from Flex Coat. You have the rod builders epoxy, which is used as a "glue" Like the Devcon products. Then you have the Flex Coat finish epoxies. (High Build and Lite.) This is what is used to cover the thread wraps. These are better suited to the purpose of a top coat on a lure. They now have a UV stabilizer added to the mix. Dick Nite's lure coat is a great product. It has a few draw backs such as smell. It is not overly strong, but too strong to use in the house at the kitchen table. If proper precautions are not taken, then you can set the whole can off after opening. As it is solvent based, you have to be careful with paint compatibility. If in doubt as to paint compatibility, you can use a top coat of epoxy then the D/N Lure coat. Dick Nite's is a moisture curing urethane. It is more resistant to hook rash than any epoxy I have ever used. Dries clear and will set up to the touch in a few hours, but will need at least 3-5 days to cure prior to fishing. I normally wait a week. According to Dick himself, it will continue to cure for 30 days. Eric
-
Id, There are some good books and DVD's that you can get to start. Tom Kirkman's book is easy to understand. Flex Coat has a DVD called "How we do it." These are two good places to start. You can also look into the books by Dale Clemens. I have not read any of his, but they come highly recommended by the experienced builders. A lot of good info on this sight and the one I will link below. http://www.rodbuilding.org/list.php?2 Eric
-
Thanks guys. Fourbizz, That color will hunt. Works real well in the clear water around here. Id, follow the link below to look at the one I posted last month. I have not finished the one I am building now. Can't find the decal that I want to finish the theme. http://www.bassresource.com/bass_fishing_forums/YaBB.pl?num=1230344269 Eric
-
Here are a few that I messed around with to try and get back in touch with the airbrush. Had quite a bit of rust to knock off due to lack of time to build lures thanks to building a few new rods. Eric
-
Marty, I know this is going to sound weird, and no I don't have a fever. The two "shallow" runners look super sweet. Simple, yet superb. Eric
-
That's the first batch I have seen in a while with the "pixie" dust. 8-) Eric
-
Thanks guys. bnw, I brushed the top coat on. Next time will spray the top coat as it was starting to tack up by the time I had made the revolution. Flechero, I agree the I am looking forward to getting a few seats at High Point to mess around with. Eric
-
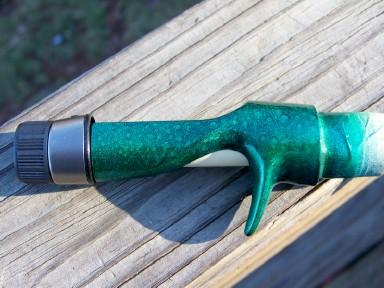
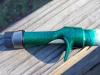
This is a Fuji ECSM reel seat that put a water spot paint scheme on. Top coat is Dick Nite's lure coat. Eric
-
Very subtle scheme on the trap. Nice! Eric