Vodkaman
Members
-
Joined
-
Last visited
Everything posted by Vodkaman
-
I was looking at your swimbait, but decided not to post in the end. I should have. Dave
-
Thanks for the numbers Whittler. The density of PVC = 0.561gm/cm3 or 34.9 Lb/cu.ft. The closest common wood is pine. Here is a link to wood densities for reference: http://www.csudh.edu/oliver/chemdata/woods.htm Dave
-
Nate - nothing wrong with those designs. If someone with the PVC has a digital gram scale, could you measure up a rectangular chunk (length, breadth and width), weight in grams and post the numbers. It would be nice to put a density number on this stuff. No one else has done this yet, to my knowledge. Dave
-
If I was going to cast PVC baits I agree, but if I was going to cast foamies, the PVC proto is not going to help much. I guess we are getting off subject. Dave
-
Absolutely. But it is pointless prototyping in a material different to your production, they will never balance or swim the same. You have to make a mold and cast a dozen bodies for testing. The body shape generally doesn't need to be proven, as long as the shape is reasonable, it can be made to swim. Fixing the lip position and angle before prototyping is cutting down your options for testing, but again, as long as it is reasonable, a solution can be found. If the mold is made with an over sized lip, then you still have the variables of lip size and shape. Once the solution is found, the mold is modified or a new mold made (several), incorporating the lip, ballast and harness. Jigs made for making the harness and a lead mold made to fix the ballast onto the harness. This way, the lure should be repeatable. Dave
-
Action has nothing to do with material choice. If two materials have the same density and used to make two identical lures, they will both swim identical. Given two identical lures, but one using a denser material than the other. The lighter material will make a livelier action than the denser. You cannot say that one is better than the other, it all depends what action you are looking for. Dave
-
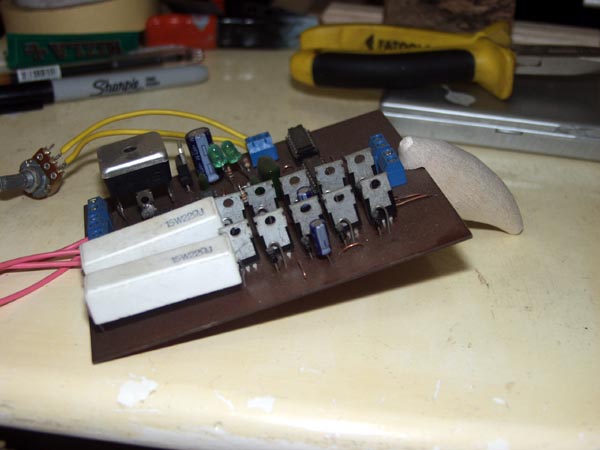
The ideal with computer modelling hardbait bodies, is to have access to a rapid prototype machine. 'Print' off the master and make a mold. At the moment, I do not have such access, but still looking. I do the 3D CAD thing so I can see what the final lure looks like. Then I print off a few profiles and make a master for the duplicator machine (by hand). The above sunfish body is done, just waiting for the epoxy to harden. Should be able to cut a few bodies in 24 hours, testing proto's in 2 - 3 days. It looks very neat, nice shape. Another advantage is that I can scale up to another length in minutes. I can even tweak the depth down a tad, if the longer version gets too deep in body. Once the 'sunfish' body is modelled, I have an infinite size range available, so if someone requests a particular size, the design work is done. I am currently building up a library of masters, so I could decide to sell bodies in the future or go the finished lure route. Not decided yet. Dave
-
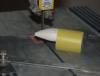
It is a new soft plastic swimbait I am working on. It is 2" long, with a paddle tail. Their is nothing out there in this style that is very small. I designed it chunky, so that it has enough substance to cast and carry a hook. Here is a pic of the master, but I haven't got around to molding it yet. Dave
-
Nate, you have inspired me to do more work. Just off to the cave to cut the baby sunfish (2.5"). Dave
-
If I could only keep one of my bench tools, it would be the belt sander.No2 the drill press followed by the bandsaw. But you don't need any of these to get started, they just make life easier. Dave
-
Thanks for the feedback GT. It's mainly the pic in the post that tells the hinge story. Dave
-
Here is a hinge design that works well for small baits, were space is a premium: I call it the double pin hinge. Hope the vid works, my computer will not play it. Dave
-
HahahahahahaROFLhahaha. ;D Dave
-
Very sorry to hear the news Justin. Tell your instructor that plan B is a kayak. Dave
-
I listen to didgeridoo music or Enya if it is really difficult work. I work in a different way to you guys. I start off with profile curves, arcs, conics and splines as a last resort, to represent profiles in plan and side. From these I throw straight surfaces in side and plan. I then blend surf between them. I can then adjust the tension of the blended surface to suit. The secret is not to try and do too much with one surface. Nose top and bottom, middle top and bottom, tail top and bottom, then symmetry. Close the surface and fill to make a solid. You could then carve away detail, but I never get involved with that. Those models are looking fine Nate. If Nate says he does not mind, ask away, it is all relevant and we may all learn something new. Dave
-
You get to play with the more technically oriented bass. Dave
-
You have done a tremendous job modelling this in CAD. It is not as easy as people might think. Keep us informed of your progress. Dave
-
I drill and bondo. I really like the bondo because it is ready for sanding within 30 minutes. Sands real easy with a flap wheel on the drill press. It accepts pain well, but I seal after this process anyway. Dave
-
Presumably you want to fit the same weight and hardware every time and get the same result. I think this is easier to achieve with resin than wood, as wood density varies even from one end of the plank to the other. At least with resin, you can control the density. You need an accurate digital gram scale, for measuring out the micro balloons AND the resin. Control the numbers to 0.1 of a gram and you will achieve the consistency that you are looking for. Keep records too, very important. Once you know the ratio of resin weight to MB weight, you can use a spreadsheet. Type in the resin weight and the spreadsheet will tell you the MB weight. Another method: Record the weight of the blank body and the weight of the ballast that you add, to the perfect swimming lure. Then if the next body is a fraction heavier, you simply reduce the lead by the same amount. The final lure should always weigh the same, because you have controlled the lure volume by molding. This is the method that I use on my duplicated wooden blanks. It is not as complicated as I make it sound. Communication is not my strong suit. Dave
-
I understand what you mean about the carving aspect. I can do it, but not a big fan. This is why I built the duplicator, as the resin was too heavy for what I wanted. The dup m/c is not brilliant, but a couple of minutes on the flap wheel and it's done. I can cut 100 bodies in a long day, then don't need to bother for a while. Dave
-
The CNC idea may not work out as well as you might think. You will only be able to CNC two halves, also the machining time will be longer than you would imagine and the finish will still need cleaning up. You could consider making RTV molds of your bodies and pouring a resin like alumilite. This would save you the carving chore and give you consistent bodies to work with. I hope I am wrong about the CNC thing and if you need any help with the CAD bodies, just PM me, I have done a few. Dave
-
I really like the crank, good paint. The depth comes down to the tow eye position. Try very slightly further back on the next one. That design should be capable of getting deeper than 3', I was thinking 7'. Getting the eye position right may take a few goes, until you get a 'feel' for it. Too far back and it will swim nose down and go shallow again, may even blow out (spiral). You have to find the optimal position for max depth. Dave
-
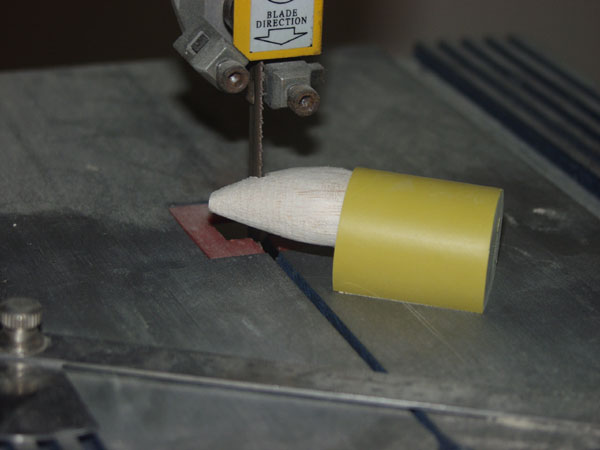
This is the way I cut the slots on duplicated bodies: The jig/mold is bondo. The mold box was PVC water pipe. I glued the short length of pipe to an old tile, using CA glue. Poured in the bondo and placed a body in the mix, close to the side of the pipe. This leaves plenty of room for a flat to be sanded. Adjust the flat to get a straight cut with the bandsaw. Have a long piece of wood handy to hold the lure body in the bondo, it will tend to float up. Dave
-
It is roughly the same technique for both. It is all about learning how many layers are required for the job (what ever it is) and learning in which direction the weave of the cloth should go, to achieve the strength. The main difference is that the carbon is cured in an oven and I assume they already have that equipment, as they are offering you the choice. I would go with the carbon. Dave
-
That sounds like a great opportunity. I think the biggest problem that you have is going to be getting the tapered mandrels made. Talk to your machine shop supervisor, see if he can help you out. Keep us posted. Dave