crankbait2009
Members
-
Joined
-
Last visited
Everything posted by crankbait2009
-
Thats where my mind was too. Id certainly be more comfortable using 4 gauge. Figured id ask before buying. Thanks for your input
-
just got my trolling motor in today. now begins the process of trying to determine all that I need in order to hook this bad boy up. minn kota terrova, 55lb thrust trolling motor, going on the bow of a Bonafide PWR. Battery will be somewhere around 10ft away, towards the back. I will be installing a 60a breaker per minn kota's recommendations. On their site, they mention that the required wire size to use is: Up to 5ft wire run: #8 5-10ft wire run: #4 10-15ft wire run: #2 A number of videos I've seen about installing these trolling motors, all mention using #8 wire. I understand the wire size is determined by distance, but it seems like everyone is sticking to that #8 wire. I'm really nervous about using the #8 since minn kota suggests #4/#2. can anyone shed some light on this? Is it best to stick with MK's suggestions on something like this? I have never installed or owned a trolling motor before. this is all new to me
-
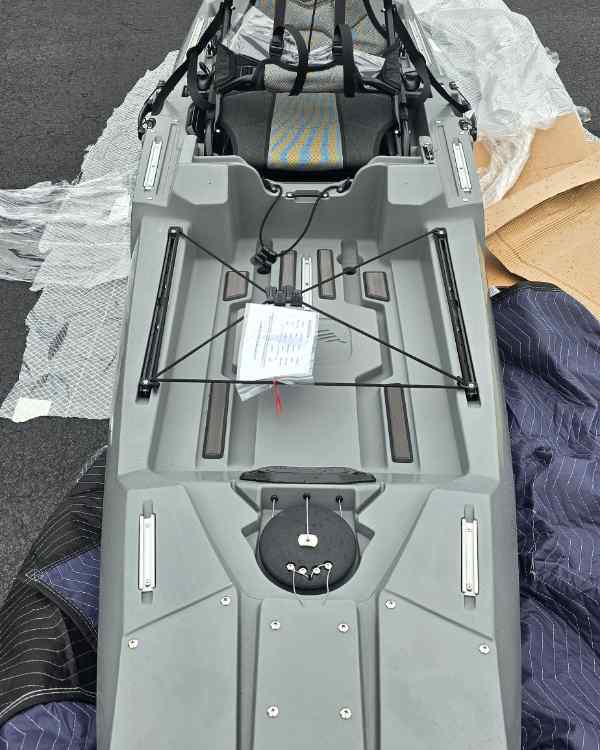
Im trying to adjust the photo size from my camera album. But I got nothing. There's gotta be a way. Let me try a resizing app as others mentioned...... That worked!!!! Yessss. You can see the securing point that I mentioned in the original post. Its right in front of the seat. Or behind the seat, whichever makes sense 😀
-
i have a Samsung Galaxy S24Ultra but I am not seeing that resize photo option. I can edit everything, but that
-
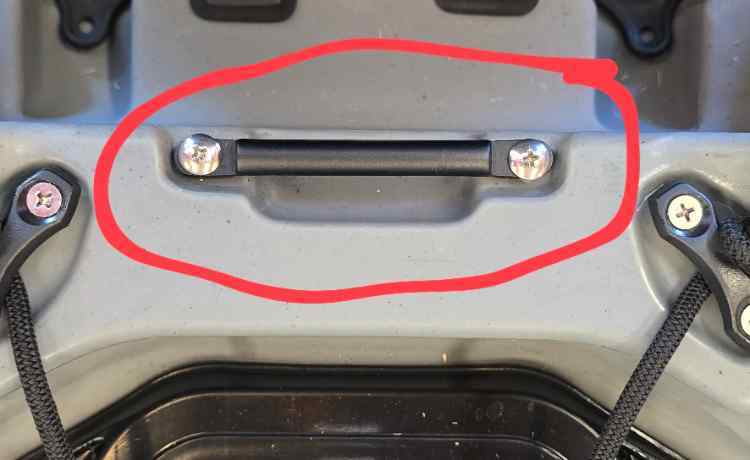
Now that you mention tie down for cargo....I could use that tie point for holding down a battery box at that location.
-
I wanna add a bigger photo for more detail, but the image size restriction limits it.
-
This will probably be a quick answer, but, behind the seat in the rear well area. There is a small round bar that is roughly 3-4" long. Can anyone tell me what its for?
-
I am looking to add the red/green navigation lights to my Bonafide PWR. I am seeing two options.....the Yak-Power strips and the Yak-Power button LED's. I see a lot of people complaining about the adhesive on the strips. overtime the adhesive fails and the LED's end up drooping. Especially if you get the 12" runs. As for the LED button style. no major negatives that I can see, but more of a concern. LED's certainly more appealing. But they are smaller in size than that of a 10"+ strip. I have watched videos on both. for installation, as well as functionality. my question is this. If using the strip lights, they cover more area of the hull and I would assume that they are more visible by oncoming boat traffic. the buttons do have a domed lens, but with them being directed outwards, does the beam of light get lost for boat traffic coming towards you? seems like they would be more difficult to see. If anyone has the buttons installed, care to share your experience? https://yak-power.com/products/10-led-light-kit-2-piece-red-green https://yak-power.com/products/2-piece-super-bright-led-button-light-kit
-
I ended up taking my Bonafide PWR for it's first test drive this past weekend. I put it ass end in first. I don't have a motor installed so I was able to push it all the way in. that kayak certainly has some weight to it. that'll take some getting used to. I put a cam strap on both the left and right side, utilizing the scupper holes. I used the bed extender and strapped it to that to help with potential bouncing as I was going down the road. drove for an hour and a half on the freeway with zero issues. went well. I did remove some items off the kayak, just in case. but I feel most of it could have stayed aboard. one thing that i did struggle with, was lifting the kayak up a tad, in order to remove the extender so that I could slide the kayak off the bed of the truck. one hand to lift the kayak and hold it slightly up, and one hand to remove the extender. all in one motion. I think I ended up using my back on the underside of the kayak to help lift. that way I had two hands to remove the extender. that was the only real issue. now, once the motor and batteries get installed, we'll see what kind of issues I run into due to overall weight. but everything went well with the 6ft bed (with tailgate down). just a lot of weight.
-
As tempting as that would have been....I just had a Bonafide PWR129 delivered today at 11AM! Initial look over and i couldn't be happier. Huge upgrade from what I have. Can't wait to get it on the water!
-
thanks. same here, I have a crew cab short bed. glad it works well. that's what I was hoping to hear @slowworm when hauling the SS in the truck bed, how difficult is it to unload/load the kayak into the bed of the truck due to the kayak's weight? assuming you cart it to the water with wheels.
-
for those of you that own a 12'-9" kayak (specifically Bonafide PWR129), have any of you transported it around in the bed of a truck? How does that work out for you? I currently have a 10ftr, and will be upgrading to the Bonafide PWR. The length is a little concerning. I'd really prefer not to have a trailer. The kayak is long enough as it is. It would be easier to haul in a truck if possible. I do have a hitch extender that I currently use for my kayak. I'm hoping it would do just fine if I get a 12ft+ kayak. anyone have experience with this?
-
finally got a response from Bonafide on this. With the kayak being an older model, they only carry the popular colors now. which happens to be the camo and steel blue color. The EX and PWR are the replacement/upgraded versions.
-
I am loosely looking to upgrade my kayak. I have my sites on a Bonafide SS127. Been looking online for them, but the color options are very limited. I see a steel blue color and a camp color. Most online vendors don't have them in stock. I was hoping to see more color options on Bonafide's website, but those two colors i mentioned above are the only ones available. Anyone know if these are being discontinued? (I was looking to get the battleship grey or the red line kayak.)
-
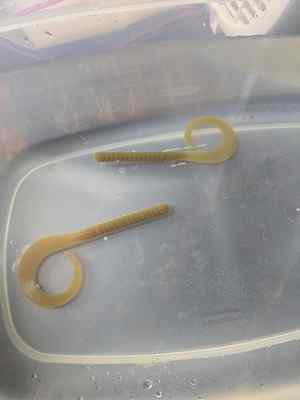
Thanks for the details. Currently i am using the dead on plastix red label worm plastisol. I'm new to the hobby so that's all I am using at the moment. I made a buncha worms and the red label worms definitely float. Made my first batch with salt, adding roughly an 1/8th of a cup of lure works fine salt. That definitely made the stick baits sink. After doing that, that's where my original post came into mind. Thinking the sinking plastic took place of salt. I dis see a video a while back where WWF mentioned using table salt. I dont remember the outcome, but that is certainly cheaper than buying fine salt online.
-
does anyone have experience using sinking plastisol? what about using a non sinking plastisol, but adding salt to aid in sinking. curious to know if sinking plastisol is the better option.
-
im looking for a nice vibrant red liquid color for plastics. I recently bought a bottle from dead on plastix. I shook it up several times. I added a lot of t to my plastic and it ended up looking orange once injected and cured. to save me from buying a bunch of different bottles, can anyone recommend a good red?
-
Which i do, but right now I remove it after every injection. Slows down the process 😊
-
when you are injecting cnc molds with the injector. once you inject all the plastic and need to refill to continue on, can you keep filling the injector up with more plastic even though you have the left over plug from the previous injection? right now, after each injection, i am opening the injector to remove that leftover plug. then i fill back up and proceed. is this plug removal needed during the process? the only thing I think that it does, is decrease the amount of plastic you can draw in for the next injection. anyone have any thoughts on this?
-
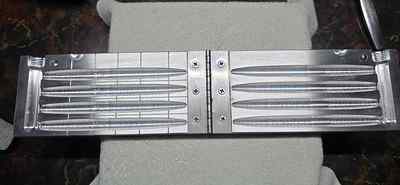
@Jig Man - here's a photo of the mold I got. I got it from Do-It Molds
-
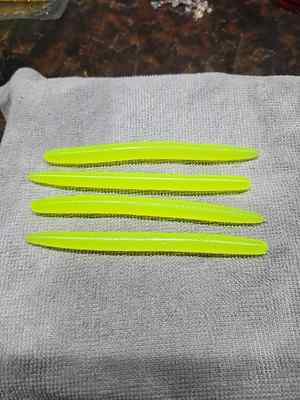
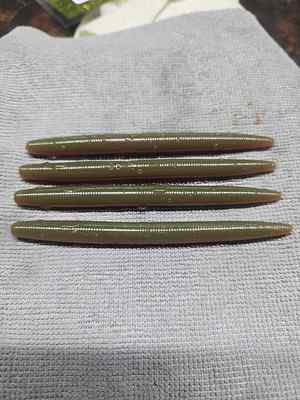
Well, the temperature difference between the mold and plastic was the culprit. I warmed the molds up to 300 and it did the trick. Downfall? Those molds take a long time to cool down, even after injected. Had to wait a good while before cracking the mold. So I might warm them up to 200 and see how that goes. The worms are coming out nice now. here's some pictures
-
I'm using the red label - medium plastisol from dead on plastic. the molds I have are vented
-
350
-
@JIGMAN what method do you use to warm your molds up?
-
I bought my 3oz injector from basstackle too. Let me try and warm the mold up and I'll see how it goes. I'd certainly be happy if this 3oz injector could fill the senko mold. I thought about lubing the mold. I've heard some ppl use the worm oil that you use for bagging, to lube the mold. I have a big bottle of that I could try. I'll do the lube first. If that fails, then I'll try the warming method. Then if that fails, I'll do both. Thanks for the input