Fishwhittler
Members
-
Joined
-
Last visited
Everything posted by Fishwhittler
-
Those are all just gorgeous, but I'm partial to the trout. Great work! 8-)
-
Those look great! That last bait is particularly nice. 8-)
-
Very nice! That last bait is awesome. 8-)
-
That looks very good. 8-)
-
I use egg sinkers for ballast. I drill a hole equal to the diameter of the egg sinker I'm using and epoxy the sinker in place.
-
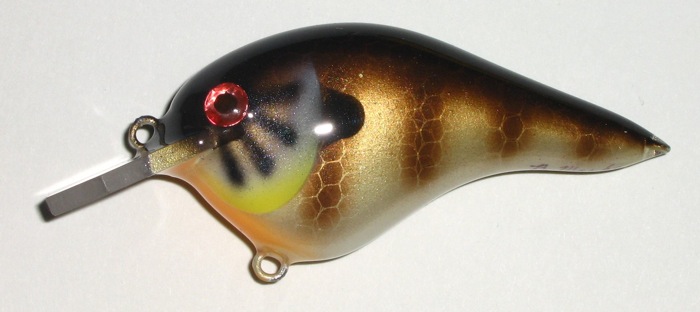
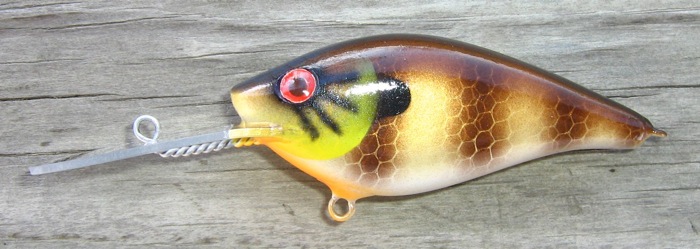
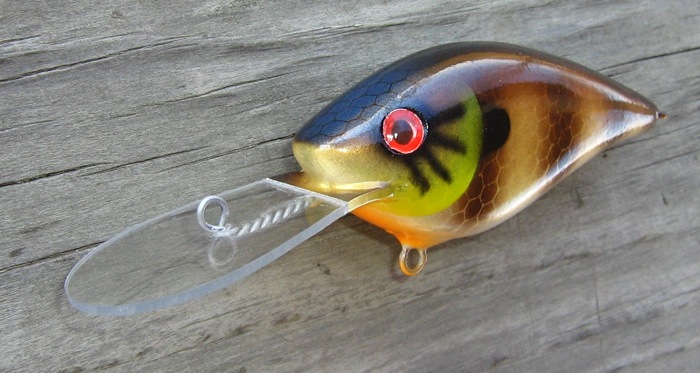
Finished a couple more. I liked how the Lucky Craft Winter Craw pattern looked, so I came up with this version. I also finished another crankbait in my Warmouth pattern. Merry Christmas! Ben

-
Very nice! 8-) How deep will that bait dive?
-
Very, very nice baits!
-
That bait is awesome!
-
I get it from Mudhole.com. It's pretty cheap in the bigger sizes; you can get 32 ounces for $45 and that will last for a long time. I've found it necessary to use U-40 Color Lock before top-coating with U-40 LS Supreme medium build. You will get fish eyes with LS Supreme medium build unless you use Color Lock first. I found that out the hard way... :-X The only other downside to using LS Supreme is that it takes 24 hours to dry tack-free, and up to a week to fully cure. It cures faster at warmer temperatures, but it still takes five days to reach full strength.
-
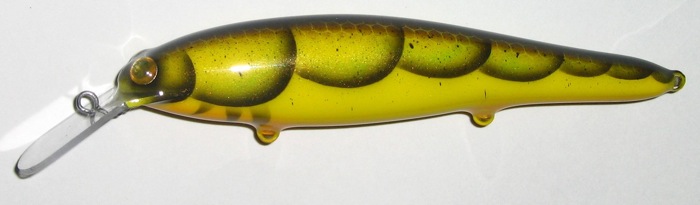
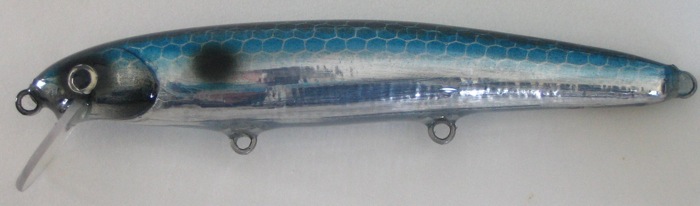
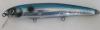
Here's my latest: Foiled jerkbait and a blue craw crank. Thanks for looking.
-
The main tools I use: Bandsaw (a scroll saw also works) Drill Adjustable square for marking the centerline on the bait Utility knife for carving Needle-nose pliers & vise-grips Dremel tool The main materials I use are: PVC trim board 19 gauge stainless steel wire Lexan sheet 5-Minute epoxy That should help you get started. Here's a link to the Swimbait Compilation Thread. That was a thread all about building swimbaits, but a lot of the info applies to any kind of hard bait. I'd also recommend you look around at the older posts in this forum. There's tons of info there regarding just about every aspect of lure-making. I hope this helps. Ben
-
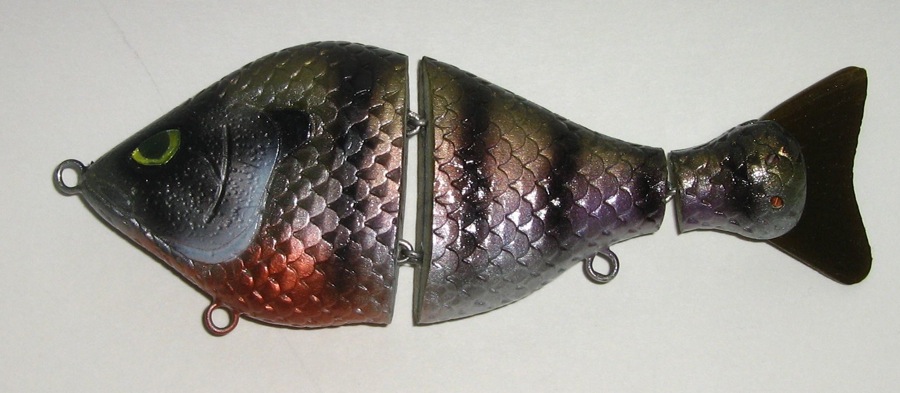
Unfortunately, I lost that bait not too long after posting pics of the finished bait. :'( I was trying to cast it with a Daiwa Silvercast reel (not the best idea, but it was all I had working at the time), and the line tangled inside the reel and snapped off. I think the tangle was partly due to the reel engaging during the cast, but I still shouldn't have been trying to cast a swimbait with a spincasting reel. I tried dredging it up with deep crankbaits, but that didn't work. I think that bait is gone for good, unless I accidentally pull it up while I'm fishing. Here's one of the lures I built since then, using things I learned from the first one. Now I've got an Abu Garcia C3, so there's no chance of me losing this one the same way I lost the blue swimmer.
-
Very nice work! I like your Cherry Limeade pattern. 8-)
-
Those look great! I like the top left bait in the second pic. 8-)
-
Thanks guys. CCP, it has a fast, medium-tight wobble. I think it will get down to about 7-10', but I won't know for sure until the pond thaws. :-/
-
I may give that a try sometime, but for now I'll stick with the method I've been using. I don't epoxy enough baits at one time in order to need a long working time. I've never had one of my lures fail unless I was deliberately trying to break it, and then it took a lot of pressure (over 50 pounds) to break one free.
-
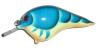
This one's bigger and deeper. PVC, 3 1/4" long without the bill (4 5/8" overall), slightly over 5/8 ounce. I tried a Warmouth pattern on this one, and I think it turned out pretty good. Let me know what you think! Ben Edit: New pics added.


-
Very nice work Big M! That pattern is gorgeous. 8-)
-
I use Flex Coat 5-Minute epoxy for bills, ballast, and hook hangers. It sets up fast so I can get back to work quickly, and if I need to do several baits at once I add a few drops of Isopropyl Alcohol. Or, I use the Rod-Builders epoxy from Flex Coat that has a 2 hour cure time when I need to do a bunch of baits at once. You won't be able to inject 5-Minute epoxy into the hole. I use a thin wire to poke epoxy into the hole, and then I cover the screw eye shaft with epoxy and insert it into the hole.
-
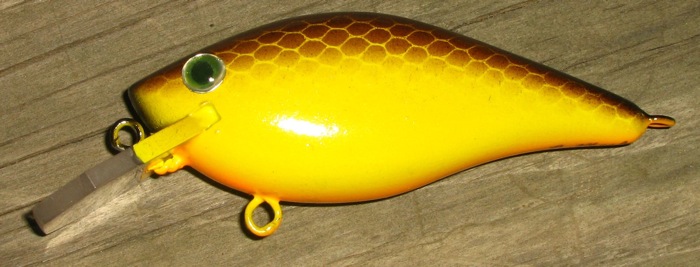
Here's one of my newest baits. I styled the body after the Lucky Craft RC and BDS series crankbaits. PVC, coffin bill, 1/2 ounce, 3" long not counting the bill, dives down to about 3-6'. I used 1/8" thick lexan for the lip instead of the 1/16" lexan I normally use. The thicker material is harder to cut with metal shears, but I found it easier to install the line tie straight in the thicker bill. It was also easier to control my dremel tool while I was sanding the bill to it's final shape, because it cuts through the thicker lexan slower. I used Seal-Coat Lure & Jig finish for topcoat. The finish is pretty nice, although I think it would work best on plastic lures or baits with carved details. It's a little on the thin side for my taste, but only the fish will be able to tell me how strong it really is. Let me know what you think. Ben

-
I did finally manage to figure out how to kill a catfish. I drove some nails through it's head into a board (it usually took one 20 penny nail plus about three 16 penny nails before it would stop moving). Then I'd skin and fillet it. I tried nailing it to a tree trunk and cleaning it that way, but the board worked better for me. After it was filleted I killed it by cutting the head off. ;D No, really. Some of the catfish I cleaned this year really did survive until I cut the head off. It was much easier to clean them with the head nailed in place, but I still had to fillet a squirming catfish on several occasions. Draining them sounds like a very good idea. I'll have to try that next year. Thanks for the tip!
-
Those are simply amazing.
-
Those are awesome! 8-) I really like how you did the dots.
-
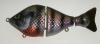
Thanks guys. Dave, I made a tool that gives the round scale shape. I took a piece of 1/4" steel rod and cut off one end at a 45º angle, and then I filed a concave edge on the sharp end. I can post a pic if that would help. I wanted this pattern to be darker than the first one I did, so I sprayed on the black heavier and did several other things that made this paint job darker than the original. I'm still messing with different shades to get a bluegill pattern I really like. I'm satisfied with this one as a dark bluegill pattern, so now I'm going to work on a lighter pattern that has the same basic coloring.