(='_'=)
Members
-
Joined
-
Last visited
Everything posted by (='_'=)
-
thanx!! ill look for that process... i heard about a marine lacquer i can get locally and it helps protect the wood from water, i will see if what you describe is similar...
-
thanx addicted!!! and it doesnt matter if you havent done this yourself ( neither do i hahaha)... im sure everybody here has more experience than me regarding bassboats (besides mine i have never been on another one in person), so i appreciate all your input!!
-
i would suggest using climbing accesory cord... it comes on a variety of diameters, and is very strong and resists abrasion well... the 4 mm cord is rated for mora than 1000 lbs, it is easy to tie, and is very cheap... heres a link where you can buy it, for $7 you can get 25 feet of cord.... i would get 50 feet though, it is very useful for alot of applications.... http://www.moosejaw.com/moosejaw/shop/product_Sterling-Rope-Prepackaged-Accessory-Cord_10097146_10208_10000001_-1_
-
looks good!! any pics of the process?
-
that is really nice!! unfortunately, i cant weld aluminium... i can weld metal, but i have never tried to weld aluminium an di heard it is not easy.... besides, i did a quick search today an di couldnt find any aluminium angle, only round or square solid pieces for machining.... so i went to Home Depot (we also have it here in mexico) and for less than $30 i got enough material to build all the frame for the extension.... tomorrow i will begin working, ill post pics in my other thread.... but thanx!! that is definitely a great idea, if i wa sable to do it, i would definitely choose it over wood....
-
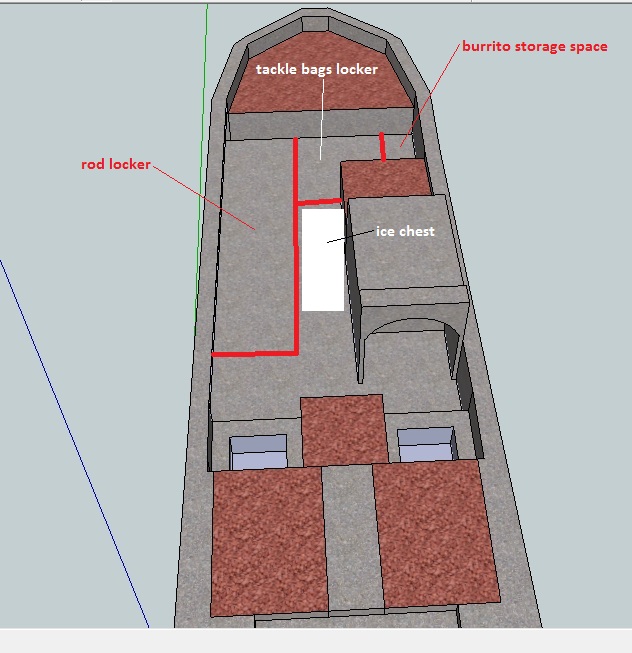
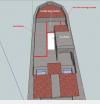
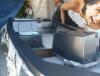
more progress was done this weekend.... i began working on the deck extension, finally.... since we use this boat for both fishing and skiing, i was wondering how to create a rod locker, and deck extension, and yet keeping the boat able to carry more than 2 persons... so today, after some thinking, and moving the cooler and 2 tackle bags around for a while, we came up with the solution.... we are going to create a rod holder on the left side.... then, on the center, we are going to put the 2 tackle bags... this will leave a small space on the right side, where we are going to keep our burritos =) all these will be permanent... and, we will make the space between the rod locker and the console and livewell, just big enough to fit an ice chest... since we can also step on the chest, and it is the same height as the deck, the chest will be part of the deck.... when we go fishing, we will put the ice chest there, since we jump on the boat in the morning and generally get down until dark... and, for skiing, we will remove the ice chest, and the rod locker will work as a bench, while the livewells will work as ice chests.... what do you think?? nothing is written in stone yet, we can change the design if you have a better idea... here is a small diagram of the deck... i would like to do it in Sketchup at least, but my brother is out of town with my laptop so im using the one from work, and i dont want to download the program in this one.... so this will have to do for now.... anyways i plan on building this tomorrow, i will take pics of the progress....
-
we dont have the time either!! haha, we have to create the time... i work from 7 am to 6 pm, so we have been working from 6 to 10 pm, and on weekends... it is hard, but worth every minute!!
-
thanx!! so 00 Mod, you suggest to make the frame out of aluminium?? aluminium angle maybe?? ill see what i can find, and evaluate the benefits (weight, durability) VS cons (price maybe, more difficult to work with)....
-
hey... as part of the restoration process of my bassboat, i want to create a bigger deck... right now it has a small front deck, a lateral livewell which is 2" higher than the front deck, and serves as a mini lateral casting deck, and a rear deck, which im going to leave as it is... my plan is to raise the front deck 2", so it is the same level as the livewell... and then, build an extension on all of the floor, leaving only enough leg room for passenger and pilot.... however, i dont know how to build the frame to support the plywood... im thinking on using 3/4 plywood, and 1x1, 2x2, and 2x4 wood for the frame.... but im not sure how to build the frame.... do you have some pictures you could share??
-
i dont know, but i am about to find out, since my current boat is an old bassboat, with tiny casting decks, and i am about to begin fabricating a rod locker and more storage space, my idea is to make a full deck, leaving only the space for pilot and co pilot.... i will post my progress here, if you want to follow... i have never done this before, so maybe my thread will only work for you to know how NOT to do it...
-
maybe you dont have the bags perfectly closed?? i keep them in the original bags, and then store the bags in 3700 organizers... i can fit 8 bags per organizer, and 5 organizer per tackle bag... that makes 40 bags easily stores, and if you fold them properly, you can see which worm is in which bag by simply opening the lid...
-
well, by "the bottom part" i meant the part that is not painted.... so actually it would be "the outside"... i think we are going to paint the part marked in red, and wrap the rest.... this part we would paint with the same color we used for the inside.... also the keel would be painted with the same color.... the bottom of the boat, what you cant see unless you lay on the floor, maybe we will leave as it is.... here is the pic of the boat as it is: one of the front to view the bends of the boat.... so what would you do?? i have a full color wrap work for free, but i dont know what to put on the wrap....
-
now, what do you propose for the bottom part?? as you can see on the first pics, the boat has some defined protruding edges, which limits what we can do as far as wraps... today we are going to remove one of the bunks, to take better pics of the entire boat and see what we could do, we are not sure if we should wrap it, or paint it.... i would prefer wraps, but we dont know what to put in them...
-
thanx Traveler!! the thing is that the flaws are not dimples, but nicks, dents, or depressions that would need to be filled with putty or bondo.... and yes, ill store the cloth for you haha
-
the flake is mixed with the clear, and then applied to the base paint.... after that we applied another layer of clear coat.... we will put a second layer of clear coat later, when we are ready to paint the motor.... another thing i forgot to add: the darker color gets really hot... today i touched the bow, which had been on the sun all morning, and it was hot, almost too hot to touch... hopefully this wont be a problem, i have seen pics of some dark boats before so i think this wont be an issue... the boat will always be covered anyways, exept while in use.... also, you may have heard that on a paint job, "PREPARATION IS EVERYTHING"... i cannot emphasize this enough... after we applied the putty, we thought most of the dents were covered.... with the next coat of primer, we discovered some more of them, but we considered they werent enough to justify appling putty and sanding and primering again... mistakenly we though the paint would cover them.... IT DOESNT.... we dont really care much about it, since we removed maybe 90% of the dents, including all the big ones.. but there are a lot of really small dents that are noticeable, specially if seen with the proper angle and light.... so, if you want a perfect job, you have to be very patient, and remember once again, PREPARATION IS EVERYTHING.... anyways we are really happy with the end product, but if we had taken more time (which we dont have, fishing season is in 10 days) to prepare the boat, we would have had a perfect looking boat....
-
so, here are some pics of the painting proces.... after we primered the first time, we saw a lot of new dents... so we used some kind of putty to cover them... this putty is like bondo, but much thinner, so it covers smaller dents better.... after we finished applyng the putty, we sanded everything with 400 sandpaper... this left a smooth surface... then we applied another coat of primer, thicker than the first one... after this, we sanded everything again, but now with 1000 sandpaper.... this left a REALLY smooth surface.... of course, after each sanding, we had to wash the boat... so basically yesterday we washed the boat like 4 times.... anyways, enough with the talking, here s a pic of the second layer of primer: and here are some of the first paint application: here are some of the before and after of appling the flakes: before: after: a little flake will go a long way... we bought $20 worth of metal flake, and it was maybe less than 2 tablespoons.... the seller considered it was enough.... we didnt even used all of it, we left some for when we paint the motor, and here is how it looks: so, we have maybe $120 USD in materials.... and a lot of labor, most of it done by ourselves, however, a couple of days we had to "hire" some friends, fortunately they charged in beer..... yesterday we also got the material to recarpet the seats... this work will be done by my grandmother and my GF, so again, free labor..... i dont have pics of the cloth yet, but we choosed 2 different gray shades for the textil, and 1 darker gray for the vinyl.... as soon as i have one seat, i will post the before and after.....
-
hey bigbarge, thanx!! as you see, we dont really know what we are doing, neither of us has done it before... but thanx to forums like this one, we have been asking a lot of questions, doing research, and then doing as best as we can... when i began this thread i wasnt sure if it was going to be a "how to do it" or a "how not to do it"... i figured out it could be usefull for someone, so, here it is.... hope we can be of some help!! and Robert, thats right... we could have paid for someone to do it, but im sure we wouldnt enjoy the boat as much, even if the final result was better than ours... we have always been of the idea that what we have to learn how to do, we learn by doing it... thank you for your comments!!
-
unfortunately its getting dark so most probably i wont be able to take pics after the second clear coat is applied... but tomorrow morning i hope to take it out to the sun and take some better pics...
-
and here´s a close up of the flakes....

-
more progress was done today... it is already painted!! i am waiting for the first clear coat (with flakes) to dry... then we will apply the second clear coat... heres a pic before the flakes:
-
-
i was looking for something like that, and i went to the flea market: }http://www.bassresource.com/bass-fishing-forums/forum/18-fishing-flea-market/ and got me a humminbird that retails for about $200, for only $100 plus shipping.... maybe you could keep an eye on there...
-
a related question for the newwbees like me.... how do you properly put a trailer on jig?? i ave been using these trailers: but i dont really knw how to put them.... a picture would be great... by the way, to answer the original question, my jigs have a trailer keeper which pins the trailer against the hook....
-
thanx!! i knew what ethanol is, however... here in mexico they dont sell it, at least not that i am aware of... there is a fuel monopoly in the country, we only have ONE brand of gas, so, theres nothing we can do about it.... anyways, i will use fuel hoses, not any regular hose.... thanx!!
-
oh, i forgot, i have not seen a temp gauge anywhere....